
I absolutely LOVE using sandbags in my yoga practice. As someone who has an anxious mind and tends to over worry, it’s probably no surprise that I gravitated towards more grounding practices like restorative yoga. With its emphasis on using lots of props to support the body and long holds (postures are held between 5-20 minutes), restorative yoga allows for a gradual downshifting of the nervous system to help relieve the stresses for daily life and leave you feeling replenished and renewed.
Sandbags have been a staple in Iyengar yoga, which is where the restorative yoga practice has its roots. Adding weight to the body, through the use of sandbags or eye bags, can help to provide an experience of grounding, bringing you out of the business of the mind and into your physical body. It provides a subtle soothing signal to the mind-body connection that it is safe, like a swaddle can soothe a baby, stimulating the parasympathetic nervous system (our rest and digest response). This creates a feeling of calm and security, which helps to ease feelings of stress and anxiety.
Here fellow restorative teacher, Yogamatters August co-host and my dear friend, Yvonne O’Garro, and I demonstrate 5 ways to incorporate sandbags into your restorative practice.
Fun fact: it was actually our mutual love of sandbags that first bonded Yvonne and I when we first met! 🙂
Reclined bound angle
4 blocks, 2 bolsters, 2 bricks, 2 eye pillows, 2 sandbags
A classic restorative posture, reclined bound angle or supta baddha konasana, sandbags can be incorporated into this pose to help ground the thigh bones.
- Position one cork brick horizontally at the top of the mat. Add a second brick vertically angled on top of the first brick and place the bolster on top. This will be to support the spine.
- Add a neatly folded blanket for the head.
- Come to sit on the mat with your back to the bolster and bring the soles of your feet together, allowing the knees to open wide.
- From there place two blocks on either side of the leg. The first block will lay flat with the second block angled to support the outer thigh. Repeat on the other side.
- Lie back along the bolster, making sure the head and neck have the support of the folded blanket. Release the skin of the shoulder blades down the back and lengthen the tailbone down towards the feet.
- Place the sandbags on either hip to ground the thigh bones.
- Option to place a mini bolster over the tops of the feet for grounding (as shown in the image).
- Stay for 10-20 minutes.
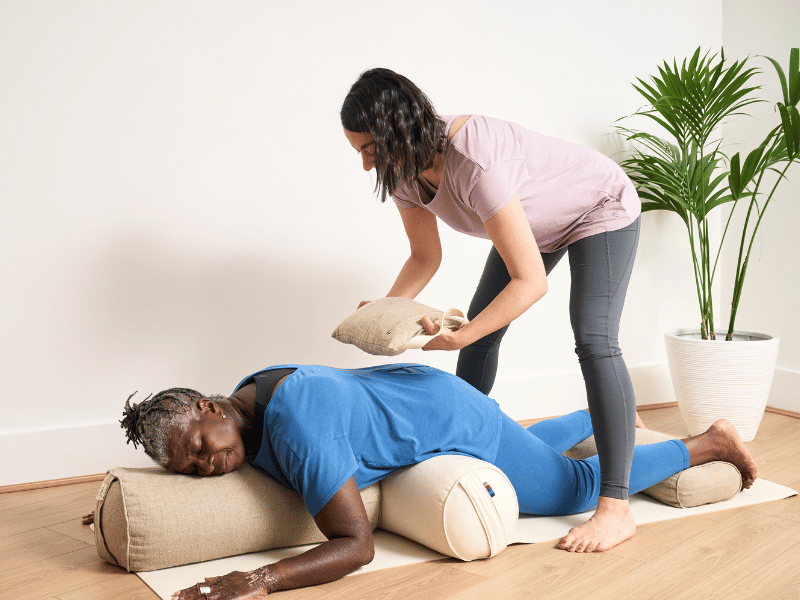
Downward savasana
2 bolsters, sandbag, small rectangular bolster
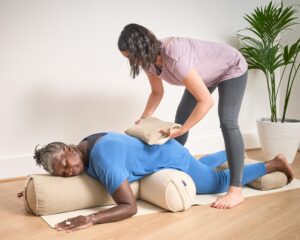
Placing weight along the sacrum (the back of the pelvis) in any downward facing posture like child’s pose or downward savasana, can help to create length along the lower back as well as release tension.
- Place one bolster vertically at the top of your mat and the second bolster horizontally across the width of the mat.
- The bolsters should be touching creating an upside down ‘T’ shape.
- Use a small rectangular bolster (as shown in the image) or a rolled up blanket at the bottom of the mat to support the feet.
- Come onto all fours (hands and knees) and place the tops of your feet over the mini bolster/rolled blanket.
- As you bring yourself down onto your bolsters, the lower abdomen will rest on the horizontal bolster, just at the hip crease, and the ribs, chest and head will rest onto the vertical bolster.
- Turn your head to whichever side feels most comfortable.
- Allow the forearms to rest onto the ground, with the elbows slightly away from the body to help release across the tops of the shoulders.
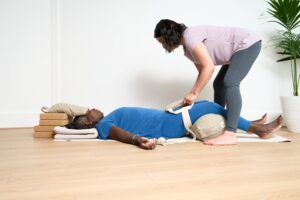
- From there place your sandbag over the back of the pelvis and slightly pull down towards your bottom to create a feeling of length.
- Stay for 10-20 minutes.
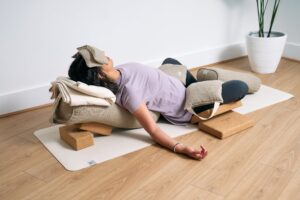
Reclined twist
1 Blanket, 1 bolster, 2 blocks, 2 sandbags

In this reclined twist there is the option to use one or two sandbags, depending on what you have at your disposal. As you can see in the image above, one sandbag is placed over the right hip, with the weight of the sandbag slightly drawing down away from the body to help anchor the hip down and create more length along the right side body. The second sandbag is placed over the right shoulder, which is particularly useful in helping to draw the right shoulder down towards the floor to help deepen the twist.
- Take a folded blanket and create a small roll, which will support the natural inward curve of the neck.
- Place two blocks, in portrait orientation, side by side, to the left hand side of the mat and then place the bolster on top.
- Come to lie down on the mat with the head on the blanket and the small roll under the neck.
- Bend your knees and bring your feet to the floor. From there raise your hips and shift them over to the right.
- Straighten your left leg down and hug your right knee in towards your chest.
- On an exhalation draw the right leg across the body to the left, placing the lower leg onto the raised bolster.
- The right knee should be roughly in line with your hip, ensuring that the whole of the lower leg from the knee to the foot is supported on the bolster. Option to place a bolster along the outer right hip to help cut the hip down and away from the right shoulder.
- Extend your right arm out to the right, with palm face up.
- If the right shoulder doesn’t quite reach the ground you can shuffle your leg shoulder slightly to the left to help release the right shoulder down. Here is where you can also place another sandbag to help encourage the right shoulders towards the earth.
- Stay for 5-8 minutes and then repeat on the other side.
Savasana version 1
1 sandbag, 1 blanket, 1 belt, 1 bolster
Savasana is one of the simplest poses to add the use of a sandbag to. It’s also a pose that is done at the end of most yoga classes, regardless of class style, so you can incorporate this at the end of any yoga practice. Placing weight over the front of the thighs helps to anchor the legs and feel grounded.
Here is a simple savasana set up:
- Neatly fold a blanket for the head, with the smooth rounded edge towards you.
- Create a loop with the belt and thread your legs through the loop. Bring the strap to mid-thigh and tighten enough that it holds the legs together hip distance apart.
- Place the bolster to the back of the thighs, just behind the knees.
- Once you lie down with the blanket under the head and neck, the strap around the legs and the bolster behind the thighs, you can place the sandbag over the front of the thighs, just below the front hip points.
- Stay for 10-20 minutes.
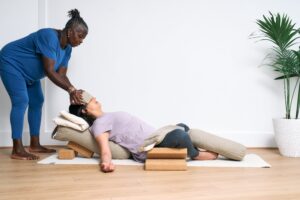
Savasana version 2
4 blocks, 1 sandbag, 1 blanket, 1 belt, 1 bolster
Placing a sandbag over the forehead has a similar feeling to using an eye pillow, however the sandbag has a bit more weight to it. Adding weight to the forehead can help to subtly signal to the mind to quieten and settle.
- Prior to lying down for savasana, stack four blocks at the top of the mat, just above your head.
- Place the sandbag on top of the four stacked blocks and then lie down for savasana.
- Pull the sandbag down slightly from the blocks until it covers your forehead.
- As the sandbag is big, only a third of the sandbag will be on your forehead with the rest of the sandbag still resting on top of the blocks.
- Make sure to evenly distribute the weight across the forehead.